11. 조도센서
11.1 필요 부품
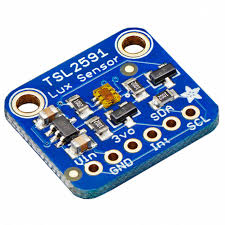
- TSL2591 Datasheet
- Approximates Human eye Response
- Extremely wide dynamic range 1 to 600,000,000 Counts
- Lux Range: 188 uLux sensitivity, up to 88,000 Lux input measurements.
- Temperature range: -30 to 80 *C
- Voltage range: 3.3-5V into onboard regulator
- Interface: I2C
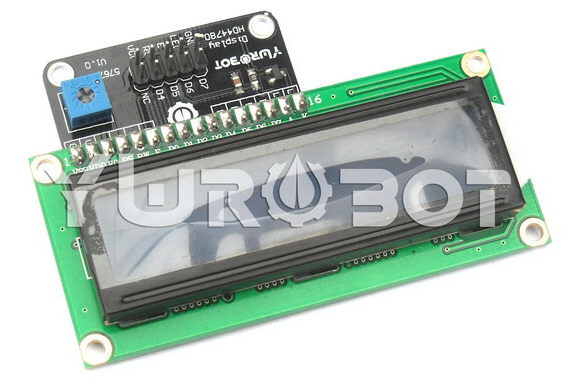
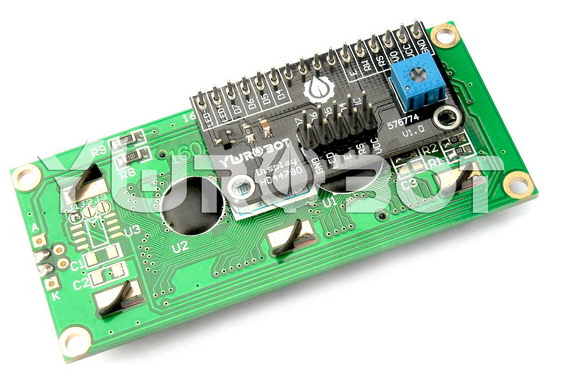
- LCD 16자 X 2줄.
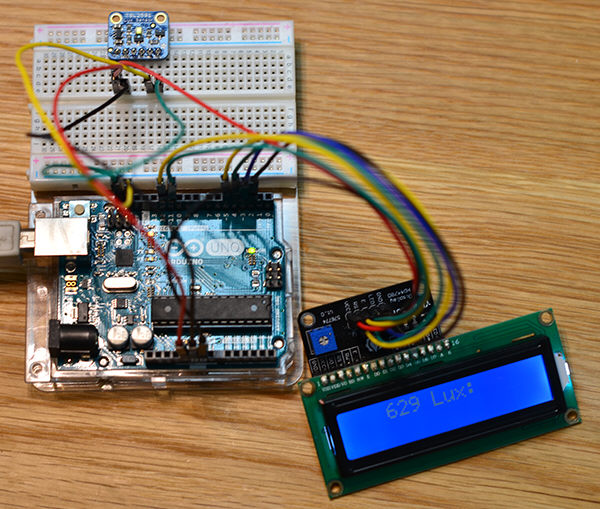
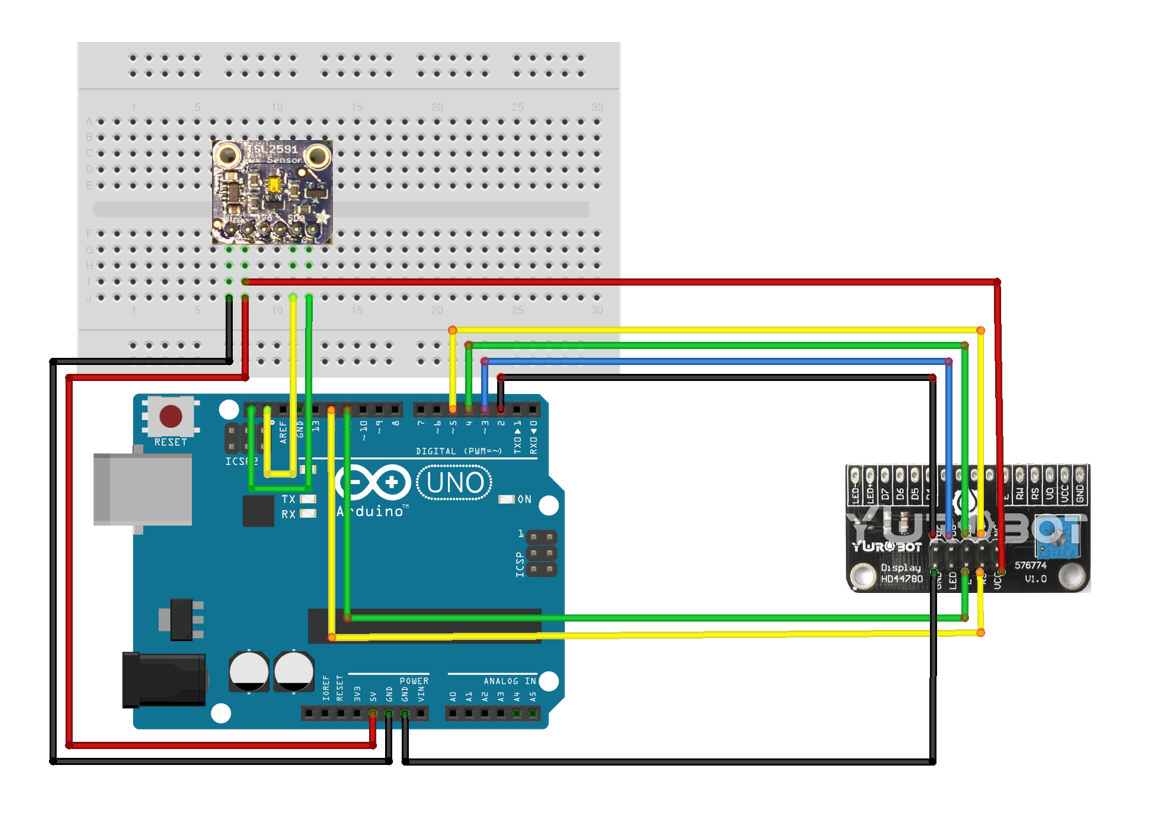
11.2 배선
- 아두이노 보드를 USB 케이블을 통하여 PC에 연결
온습도센서 배선
센서 GND -> 아두이노 GND(흑색)
센서 SDA -> 아두이노 SDA 핀(노랑)
센서 SCL -> 아두이노 SCL 핀(녹색)
센서 VCC -> 아두이노 5V(빨강)
LCD 배선
LCD GND -> 아두이노 GND(흑색)
LCD VCC -> 아두이노 5V(빨강)
LCD RS -> 아두이노 DIGITAL PIN 12(노랑)
LCD E -> 아두이노 DIGITAL PIN 11(녹색)
LCD D7 -> 아두이노 DIGITAL PIN 2(흑색)
LCD D6 -> 아두이노 DIGITAL PIN 3(파랑)
LCD D5 -> 아두이노 DIGITAL PIN 4(녹색)
LCD D4 -> 아두이노 DIGITAL PIN 5(노랑)
11.3 프로그램 입력 및 실행
- 다음에서 라이브러리를 저장 ttps://github.com/adafruit/Adafruit_TSL2591_Library
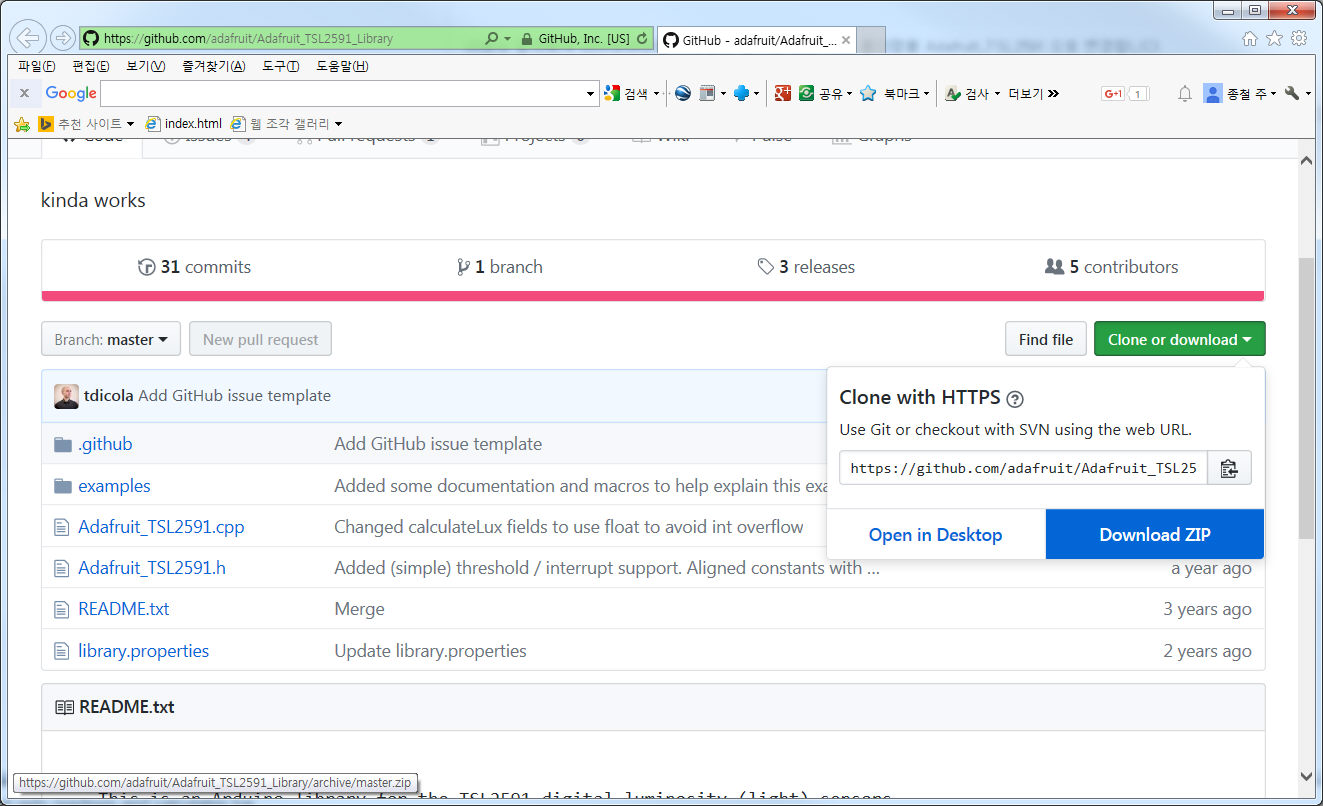
- 메뉴의 스케치 -> 라이브러리 포함하기 -> .ZIP 라이브러리 추가... 클릭
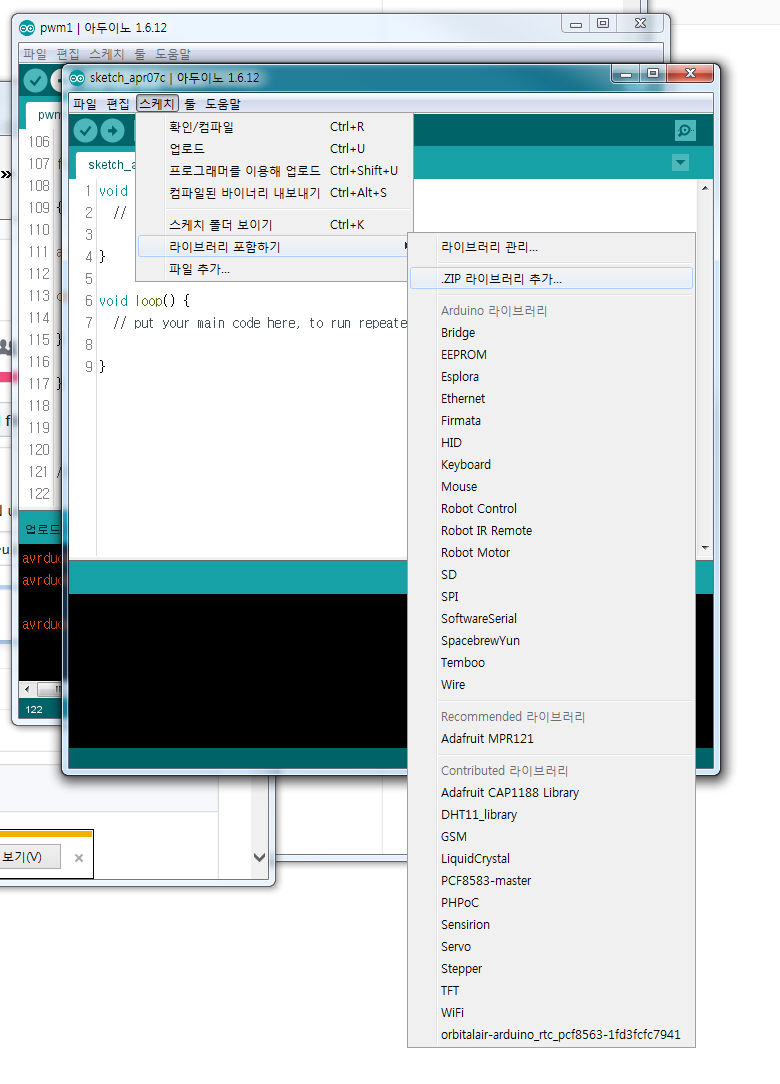
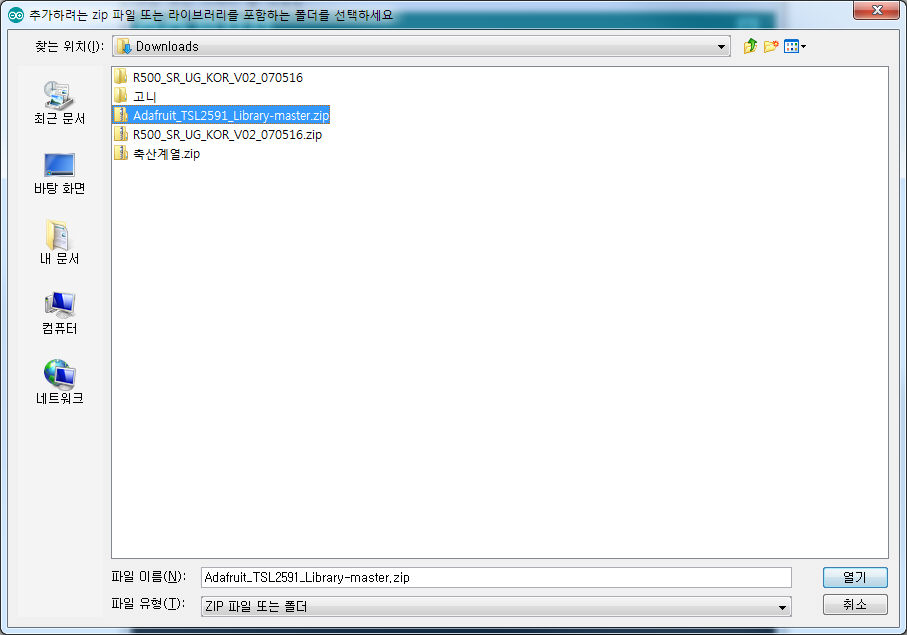
다운받은 zip 라이브러리 파일을 지정함. -> 라이브러리 등록
다음에서 같은 과정으로 등록 https://github.com/adafruit/Adafruit_Sensor
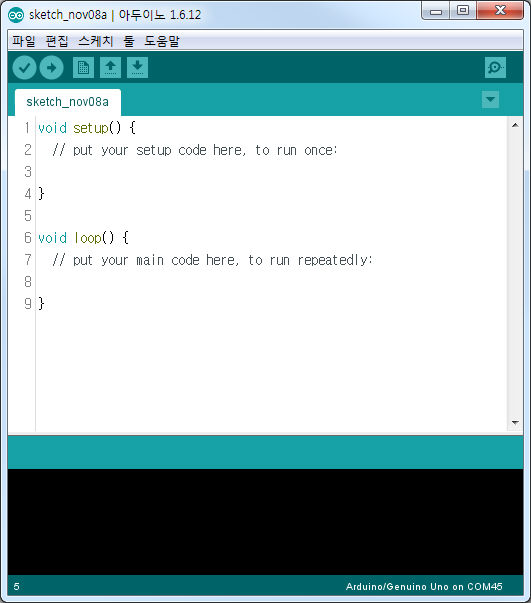
- 아두이노 개발툴(IDE)을 실행
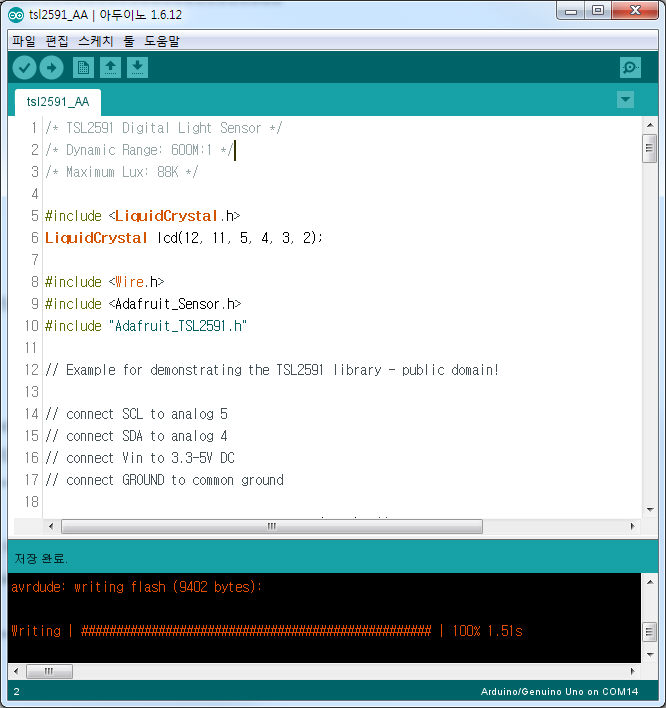
- 다음과 같이 입력 또는 복사하기 -> 붙여넣기
//===================================================
/* TSL2591 Digital Light Sensor */
/* Dynamic Range: 600M:1 */
/* Maximum Lux: 88K */
#include <LiquidCrystal.h>
LiquidCrystal lcd(12, 11, 5, 4, 3, 2);
#include <Wire.h>
#include <Adafruit_Sensor.h>
#include "Adafruit_TSL2591.h"
// Example for demonstrating the TSL2591 library - public domain!
// connect SCL to analog 5
// connect SDA to analog 4
// connect Vin to 3.3-5V DC
// connect GROUND to common ground
Adafruit_TSL2591 tsl = Adafruit_TSL2591(2591); // pass in a number for the sensor identifier (for your use later)
/**************************************************************************/
/*
Displays some basic information on this sensor from the unified
sensor API sensor_t type (see Adafruit_Sensor for more information)
*/
/**************************************************************************/
void displaySensorDetails(void)
{
sensor_t sensor;
tsl.getSensor(&sensor);
Serial.println("------------------------------------");
Serial.print ("Sensor: "); Serial.println(sensor.name);
Serial.print ("Driver Ver: "); Serial.println(sensor.version);
Serial.print ("Unique ID: "); Serial.println(sensor.sensor_id);
Serial.print ("Max Value: "); Serial.print(sensor.max_value); Serial.println(" lux");
Serial.print ("Min Value: "); Serial.print(sensor.min_value); Serial.println(" lux");
Serial.print ("Resolution: "); Serial.print(sensor.resolution); Serial.println(" lux");
Serial.println("------------------------------------");
Serial.println("");
delay(500);
}
/**************************************************************************/
/*
Configures the gain and integration time for the TSL2591
*/
/**************************************************************************/
void configureSensor(void)
{
// You can change the gain on the fly, to adapt to brighter/dimmer light situations
//tsl.setGain(TSL2591_GAIN_LOW); // 1x gain (bright light)
tsl.setGain(TSL2591_GAIN_MED); // 25x gain
// tsl.setGain(TSL2591_GAIN_HIGH); // 428x gain
// Changing the integration time gives you a longer time over which to sense light
// longer timelines are slower, but are good in very low light situtations!
tsl.setTiming(TSL2591_INTEGRATIONTIME_100MS); // shortest integration time (bright light)
// tsl.setTiming(TSL2591_INTEGRATIONTIME_200MS);
// tsl.setTiming(TSL2591_INTEGRATIONTIME_300MS);
// tsl.setTiming(TSL2591_INTEGRATIONTIME_400MS);
// tsl.setTiming(TSL2591_INTEGRATIONTIME_500MS);
// tsl.setTiming(TSL2591_INTEGRATIONTIME_600MS); // longest integration time (dim light)
/* Display the gain and integration time for reference sake */
Serial.println("------------------------------------");
Serial.print ("Gain: ");
tsl2591Gain_t gain = tsl.getGain();
switch(gain)
{
case TSL2591_GAIN_LOW:
Serial.println("1x (Low)");
break;
case TSL2591_GAIN_MED:
Serial.println("25x (Medium)");
break;
case TSL2591_GAIN_HIGH:
Serial.println("428x (High)");
break;
case TSL2591_GAIN_MAX:
Serial.println("9876x (Max)");
break;
}
Serial.print ("Timing: ");
Serial.print((tsl.getTiming() + 1) * 100, DEC);
Serial.println(" ms");
Serial.println("------------------------------------");
Serial.println("");
}
/**************************************************************************/
/*
Program entry point for the Arduino sketch
*/
/**************************************************************************/
void setup(void)
{
Serial.begin(9600);
lcd.begin(16, 2);
lcd.print("Hello, World!");
Serial.println("Starting Adafruit TSL2591 Test!");
if (tsl.begin())
{
Serial.println("Found a TSL2591 sensor");
}
else
{
Serial.println("No sensor found ... check your wiring?");
while (1);
}
/* Display some basic information on this sensor */
displaySensorDetails();
/* Configure the sensor */
configureSensor();
// Now we're ready to get readings ... move on to loop()!
}
/**************************************************************************/
/*
Shows how to perform a basic read on visible, full spectrum or
infrared light (returns raw 16-bit ADC values)
*/
/**************************************************************************/
void simpleRead(void)
{
// Simple data read example. Just read the infrared, fullspecrtrum diode
// or 'visible' (difference between the two) channels.
// This can take 100-600 milliseconds! Uncomment whichever of the following you want to read
uint16_t x = tsl.getLuminosity(TSL2591_VISIBLE);
//uint16_t x = tsl.getLuminosity(TSL2591_FULLSPECTRUM);
//uint16_t x = tsl.getLuminosity(TSL2591_INFRARED);
Serial.print("[ "); Serial.print(millis()); Serial.print(" ms ] ");
Serial.print("Luminosity: ");
Serial.println(x, DEC);
}
/**************************************************************************/
/*
Show how to read IR and Full Spectrum at once and convert to lux
*/
/**************************************************************************/
void advancedRead(void)
{
// More advanced data read example. Read 32 bits with top 16 bits IR, bottom 16 bits full spectrum
// That way you can do whatever math and comparisons you want!
uint32_t lum = tsl.getFullLuminosity();
uint16_t ir, full;
ir = lum >> 16;
full = lum & 0xFFFF;
Serial.print("[ "); Serial.print(millis()); Serial.print(" ms ] ");
Serial.print("IR: "); Serial.print(ir); Serial.print(" ");
Serial.print("Full: "); Serial.print(full); Serial.print(" ");
Serial.print("Visible: "); Serial.print(full - ir); Serial.print(" ");
Serial.print("Lux: "); Serial.println(tsl.calculateLux(full, ir));
lcd.clear();
lcd.setCursor(3, 0);
lcd.print(tsl.calculateLux(full, ir));
lcd.print(" Lux");
}
/**************************************************************************/
/*
Performs a read using the Adafruit Unified Sensor API.
*/
/**************************************************************************/
void unifiedSensorAPIRead(void)
{
/* Get a new sensor event */
sensors_event_t event;
tsl.getEvent(&event);
/* Display the results (light is measured in lux) */
Serial.print("[ "); Serial.print(event.timestamp); Serial.print(" ms ] ");
if ((event.light == 0) |
(event.light > 4294966000.0) |
(event.light <-4294966000.0))
{
/* If event.light = 0 lux the sensor is probably saturated */
/* and no reliable data could be generated! */
/* if event.light is +/- 4294967040 there was a float over/underflow */
Serial.println("Invalid data (adjust gain or timing)");
}
else
{
Serial.print(event.light); Serial.println(" lux");
}
}
/**************************************************************************/
/*
Arduino loop function, called once 'setup' is complete (your own code
should go here)
*/
/**************************************************************************/
void loop(void)
{
//simpleRead();
advancedRead();
// unifiedSensorAPIRead();
delay(500);
}
//===================================================
- 프로그램 업로드 버튼
 클릭
클릭
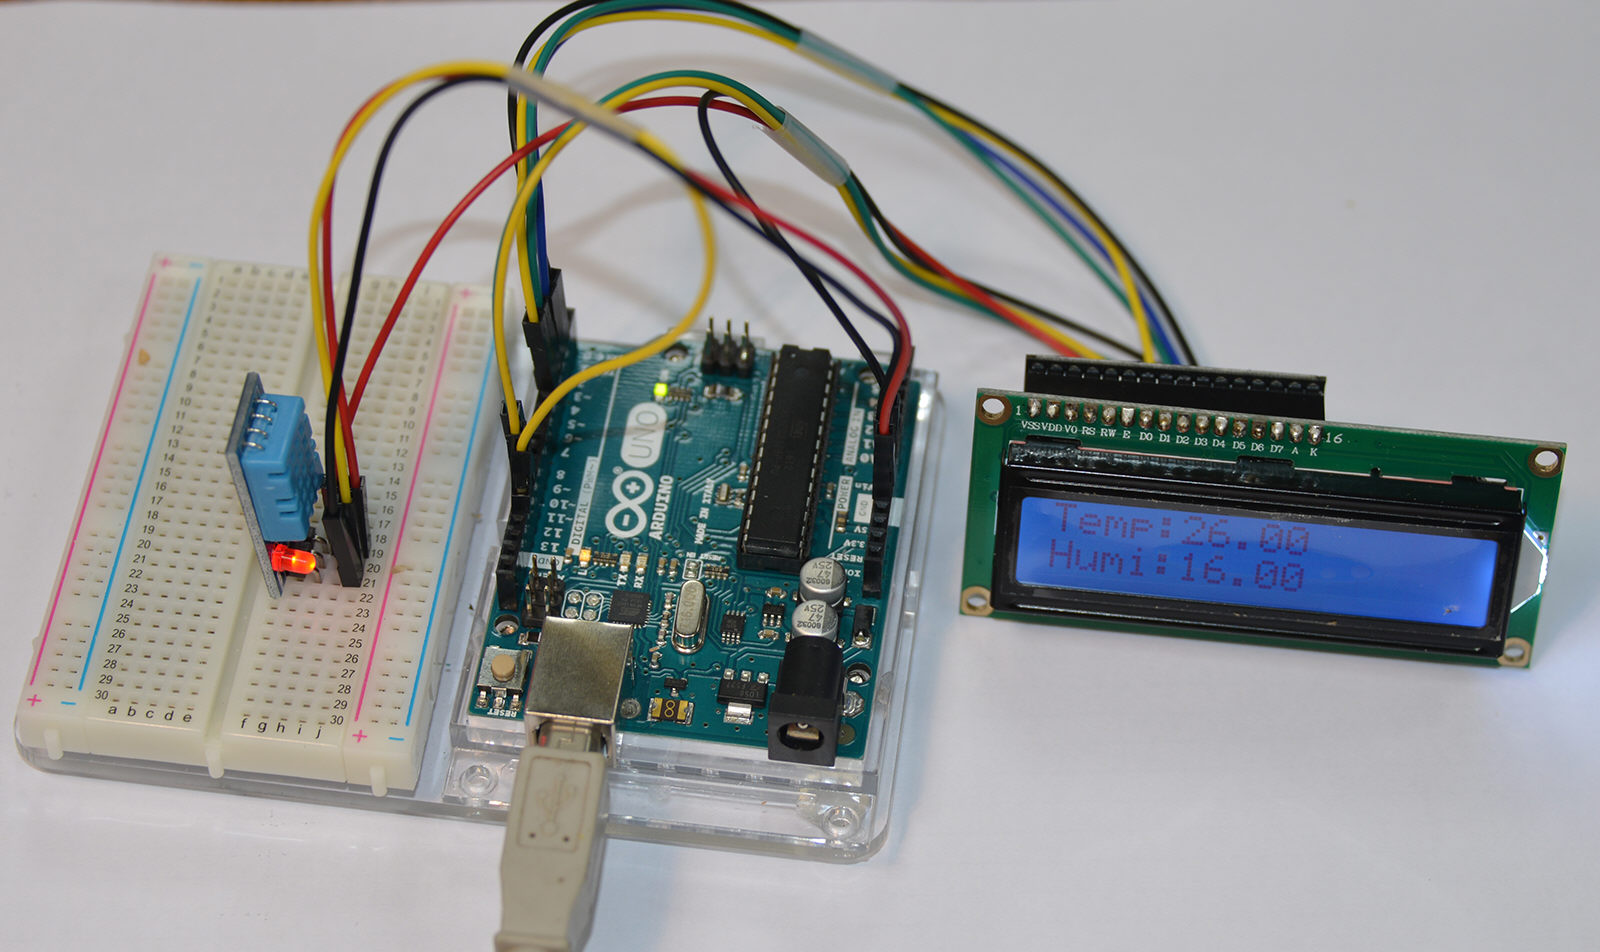
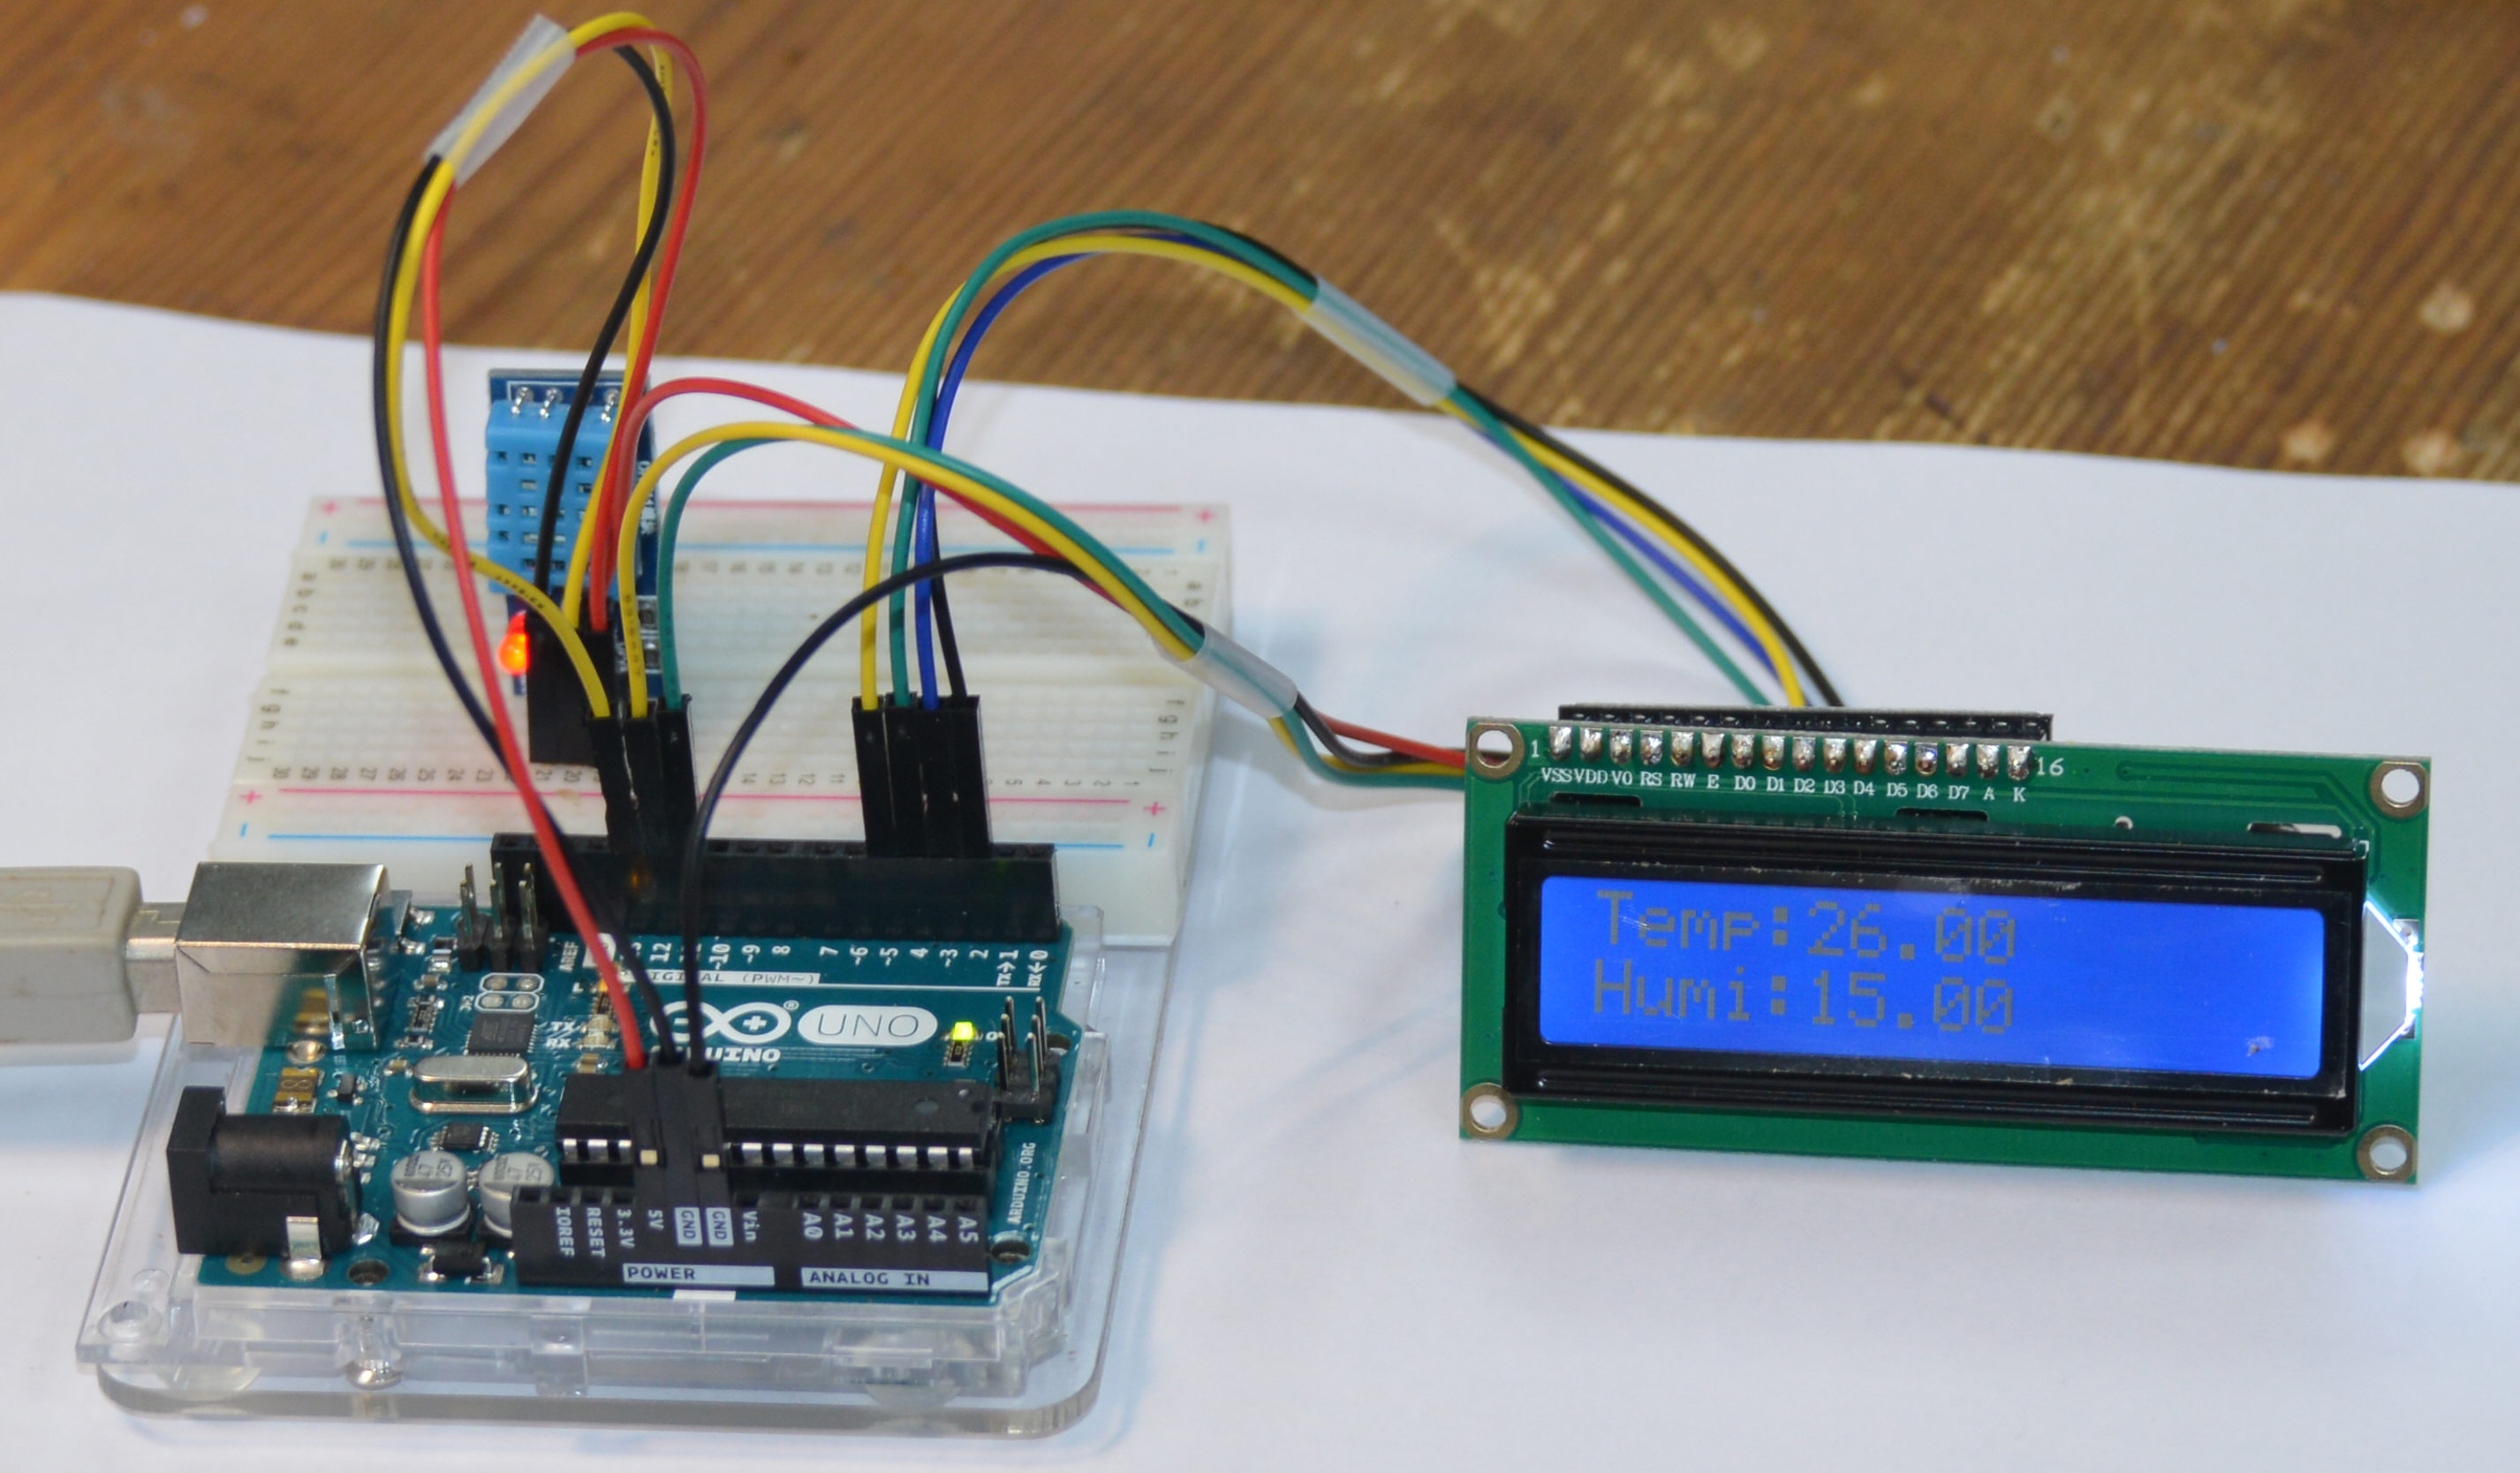
11.4 프로그램 동작
LCD의 가변저항을 조절하여 글씨가 잘 보이게 한다.
프로그램이 시작되면 LCD 화면에 "hello world!" 2초 표시됨.
LCD 화면에 조도가 표시된다.